Tuesday, November 20, 2012

Main dish minestrone

When I was a little girl, my dad made three things really, really well: pancakes, spaghetti sauce, and main dish minestrone.  The original recipe for the minestrone I think came out of a Canadian Living magazine, and was a staple in our house... until it was misplaced. No more minestrone.

A couple of years ago, I asked my dad about that recipe and he said he could barely remember it. I guess it only really imprinted on me, but I have craved it on and off for YEARS.  Every so often, I would do a quick google search and come up with nothing.  That is, until recently.  My googling finally paid off and I found what I think is the Exact. Same. Recipe. on Food.com, submitted by a reader.

I'm telling you, I did a little dance right there, and made it that night.  It tasted every bit as good as I remember!

There are many, many wonderful things for the boonies cook in this recipe: you can change the veggies you use, you can change the beans you use, you can take out the beans, you can add barley or lentils... you get the point.  It's one of those recipes that everyone needs when they haven't been shopping in a week and there's a snowstorm outside. 

So thank you bert for posting this longed-for recipe!  I owe you one!

Recipe Notes:

The original recipe calls for Italian sausage, but dad always used regular old pork breakfast sausages.  They don't slice very well, so I cook them first, then fish them out and slice them up.  You can replace the beans with any other beans, or leave them out entirely.  You can replace the pasta with barley, or add barley along with the pasta (mmm, carbs).  On the second day, the pasta and barley will soak up more liquid and it will be like a thick stew... still delicious!

Main Dish Minestrone

(Originally from Canadian Living (maybe?), posted on Food.com by bert)

  • 2 tablespoons olive oil
  • 2 tablespoons butter
  • 1/2 lb sausage, sliced or crumbled
  • 1 large onion, chopped
  • 1 clove garlic, minced
  • 1/2 cup chopped celery
  • 1/2 cup chopped carrot
  • 1/2 cup chopped green pepper
  • 2 tablespoons chopped parsley
  • 1/2 teaspoon dried basil
  • 1 pinch dried thyme
  • 1 bay leaf
  • salt & pepper
  • 2 cups chopped tomatoes (or 19 oz can)
  • 4 cups chicken stock
  • 2 cups shredded cabbage
  • 1 cup cooked or canned kidney bean
  • 1/2 cup elbow macaroni (or other pasta)
Heat the butter and oil over medium heat and saute the sausages until brown and firm.  Retrieve from the pan and slice them into 1" sections, then return them to the pan. Add the onion, garlic and veggies and saute until soft. Stir in the herbs and spices.


Stir in the tomatoes and stock.  If you're using canned tomatoes, pour the liquid in too and decrease the stock to 3 1/2 cups. Bring to a boil, then reduce the heat and simmer for about 10 minutes.

Add the cabbage, bean and macaroni (or substitutes) and simmer for 30 minutes. You can add more broth at this point if it's too thick for your liking - it will thicken even more as it cools. 
Serve with some crusty bread!

Wednesday, October 24, 2012

Stop the presses!

Or at least, that's what I've wanted to say since I discovered broccoli fritters this week.

Broccoli is a staple veggie in many boonies kitchens - holds together well in the fridge, can be frozen, is a good way to get green veggies in the dead of winter when wilty salad isn't looking so appealing...  But for years, many boonies cooks have resorted to simple steaming or boiling to get their broccoli fix, smothering them in cheese sauce so the kids will eat them.  Well, no more.  I tell you, I'm going to eat my broccoli in fritters from now on. 

These were so delicious that I was eating them straight from the pan, barely waiting for them to cool.  By the time I finished cooking the end of the batch, I had 2 left  *urp*. 

Recipe Notes:

If you don't have good parmesan cheese, cheddar works as well.
I've heard that Canadian flour is somehow different from American flour, and this has affected most of my attempts to make bread.  I know that American bread recipes call for way more flour than I can mix into the dough, and this seems to be the case with this recipe too.  When I made it, I added a couple of teaspoons of water to the dough to get the rest of the flour in, but next time I will probably just use slightly less flour - maybe 1/3 c.  Depending on where you live, this is something to consider.

Broccoli Fritters

Recipe from Smitten Kitchen

1 small bundle fresh broccoli crowns (3 cups, chopped into 1" pieces)
1 large egg
1/2 cup all-purpose flour (maybe a little less - see Recipe Notes)
1/3 cup finely grated parmesan or cheddar cheese
1 small clove garlic, minced
1/2 teaspoon salt
 A pinch of red pepper flakes or several grinds of black pepper
Olive or vegetable oil for frying

Steam the broccoli for about 5 minutes until it is soft, but not too mushy. Drain and set aside to cool slightly.

Mix remaining ingredients. Mash the broccoli with a potato masher and mix into batter until it's all the same consistency.

Heat oil in a large frying pan over medium heat until it spatters when you drip water in it. Add large spoonfuls (2-3 tbsp) of batter to the oil, keeping the fritters a couple of inches apart. Flatten slightly with the back of a spoon or spatula.  Fry until golden brown (2 - 3 minutes), then flip and repeat. 

Drain the fritters on paper towel before serving (or eating with your fingers from the plate.. *ahem*).

Thursday, September 20, 2012

Demobilizing the garden

It's that time of year - we've had a few hard frosts and if you haven't rescued your veggies from the garden, you're running out of time!  Here in Smithers, the growing season is pretty short, and despite having said it every year for the past 3 years, I have no yet rebuilt my greenhouse.  So I have to rely on crops that will put out under the normal outdoor growing conditions in my area.  This year, the growing season was surprisingly hot here, but it was still too short for my liking.

Today I want to share some recipes for things to do with the stuff from your garden, particularly where it comes to saving them for later.

Zucchini

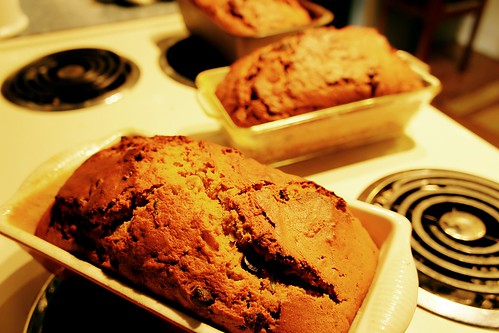
I could actually use a bit of help with zucchini this year.  I'm overwhelmed with it at the moment, and I already have 6 loaves of zucchini bread in the freezer!  Is there anything else to do but make more zucchini bread?  Here's my favorite recipe from Our Best Bites

Chocolate Zucchini Bread {makes 2 loaves} 

Recipe by Our Best Bites
  • 2 c. flour
  • 2 tsp cinnamon
  • 1/2 tsp salt
  • 1 1/2 tsp baking soda
  • 6 tbsp unsweetened cocoa powder
  • 1/2 c canola oil
  • 1 c sugar
  • 1/4 c brown sugar
  • 3 eggs
  • 2 tsp vanilla
  • 1/2 c sour cream
  • 3 c grated zucchini
  • 3/4 c mini chocolate chips (I just use regular ones)
  • optional: zest from one orange
Topping:
  • 2 T brown sugar
  • 2 T white sugar
  • 1/2 t cinnamon
Preheat oven to 350 degrees. Butter and flour 2 loaf pans and set aside. For the record, this recipe fits perfectly into one 8" and one 9" loaf pan.
Mix topping ingredients in a small bowl and set aside.

Place flour, cinnamon, baking soda, salt, and cocoa powder in a small bowl and whisk to combine. Set aside.

With a stand or hand mixer beat oil, white sugar, brown sugar, and eggs until combined and slightly fluffy, 1-2 minutes. Add vanilla and sour cream and mix until combined. Gently stir in the grated zucchini (and zest if you’re using).

Take a spoonful of the flour mixture and stir in with the chocolate chips, then mix the remaining flour mixture in with the wet ingredients. Stir just until combined. Add chocolate chips and stir to combine. Divide the batter between the two pans. and sprinkle topping over each. Bake in your preheated 350 degree oven for 50-60 minutes

Pumpkin Zucchini Loaf (with chocolate chips, which are not mentioned in the original recipe but which I feel are entirely necessary for any loaf... *urp*)

  • 3 eggs, lightly beaten
  • 2 cups sugar
  • 1 cup canned pumpkin
  • 1 cup butter or margarine, melted
  • 1 tablespoon vanilla extract
  • 3 cups all-purpose flour
  • 1 teaspoon baking soda
  • 1/2 teaspoon baking powder
  • 1/2 teaspoon salt
  • 1/2 teaspoon ground cinnamon
  • 1/2 teaspoon ground nutmeg
  • 1/2 teaspoon ground cloves
  • 1 cup shredded zucchini
  • 1 cup chopped walnuts (or chocolate chips, if you're like me)
In a mixing bowl, combine eggs and sugar. Add pumpkin, butter and vanilla. Combine dry ingredients; gradually add to pumpkin mixture and mix well. Stir in zucchini and nuts. Pour into two greased and floured 9-in. x 5-in. x 3-in. loaf pans. Bake at 350 degrees F for 45-50 minutes or until breads test done. Cool in pans 10 minutes. Remove to a wire rack. 


Beets

We loooove pickled beets!  We eat them all the time in winter, and you can use the brine in lieu of vinegar for interesting salad dressings. My go-to recipe for pickling beets is this one: Canned, spiced pickled beets

You can also use the beet greens - just steam or saute them like you would spinach, and serve with a bit of butter.

Don't want to pickle all of your beets?  Beets last for a looooong time in the fridge, so you can probably keep them in there for at least a month after you pick them.  Try roasting them with other root vegetables for a fantastic side dish: Roasted beets n' Sweets

Potatoes

I always get a fair ton of potatoes from the garden - a different variety each year.  Two years ago, I went with Russian blue (purple potatoes!), last year with red, and this year I tried Yukon gold. They've all been pretty fabulous, but these Yukon gold are so moist and juicy!  Delicious!

I keep most of our potatoes in the crawl space in the cardboard box raised off the dirt.  That keeps them cool and dry, and I just bring enough up for a few meals at a time.  We often roast potatoes with the Easy Roast Chicken, but I'm a sucker for mashed potatoes... even more so at Christmas, when my mom makes then "special".

Special Mashed Potatoes

Peel and boil enough potatoes for about 10 people.  Once you've drained them, add 1 cup of sour cream, half a cup of cream cheese, and a head of roasted garlic cloves (squeezed from the skin).  Mash together with a bit of salt and pepper, adding butter and milk if it's really lumpy.  Then put the whole mess in a casserole and pop in the oven at 350F for about 20 minutes until the edges start to brown a little.  Better smashed taters you will never taste!
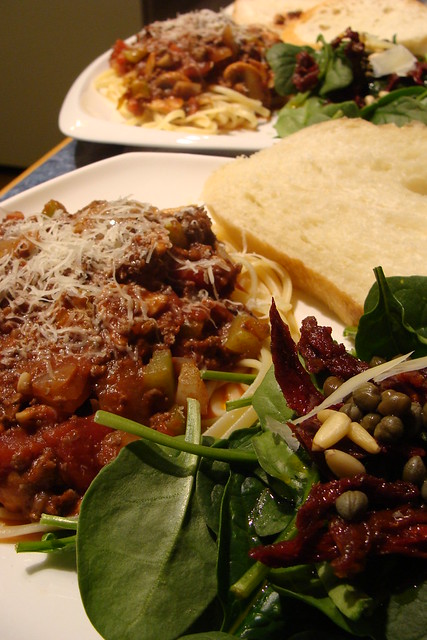
Tomatoes

I really thought with the warm weather we had this summer that this would be the year that my tomatoes ripened.  Alas, last Saturday morning I woke up to the first hard frost of the season and had to go running outside to rescue 10 more pounds of green tomatoes.  Thankfully, there are wonderful things you can do with green tomatoes. One of our favorites is this green tomato chutney, which is fantastic on pork chops and sausages.  Every year that I make it, I fail to write down the exact recipe or where I found it.  But this is basically what I do:

Green Tomato Chutney

  • 2 1/2 pounds firm green tomatoes, about 6 cups diced
  • 1 cup golden raisins
  • 1 cup chopped onion
  • 1 1/2 cups light brown sugar, firmly packed
  • 1 teaspoon salt
  • 1 1/4 cups cider vinegar
  • 1 teaspoon chili powder
Trim the tomatoes and dice them up into smallish pieces. Add cider vinegar to a large pot over medium-high heat, and add the brown sugar, stirring until it dissolves.  Add the remaining ingredients and bring to a boil. Reduce the heat and simmer for 1 hour until the tomatoes and onions are soft and the mixture is thickened. Spoon the chutney into hot, sterilized jars, leaving 1/4" headspace. Add lids and process in a water bath canner for 15 to 25 minutes, depending on your altitude (I use 20 minutes for Smithers). If any jars do not seal, use them immediately.

Green Sauce

Another great green tomato recipe is the green sauce that I make to go with Tacos de Lengua.  Click the link for the full taco recipe (fantastic recipe too, btw). This recipe isn't really boonies-friendly, but if you have access to the more unusual ingredients I'd highly recommend it as a substitute for regular guacamole.
  • 2 tomatillos
  • 2 green tomatoes
  • 1 jalapeno (1/2 seeded)
  • 2 garlic cloves
  • 2 avocados
  • juice of 1 lime
  • cilantro
  • salt
Coarsely chop tomatillos, green tomatoes, garlic & jalapeno & saute over medium heat until soft.

Halve & scoop out the avocados & puree in a mixer. Add softened vegetables, 1/2 a bunch of cilantro, juice of 1 lime and salt and puree until smooth. Put in a bowl to cool.

Kohlrabi

This is actually my first year for growing kohlrabi in the garden, but I can tell you it won't be my last.  Kohlrabi looks a bit like a turnip, tastes a bit like broccoli, and grows like crazy in my garden. I've been told that I should have harvested it when the bulbs were about 2" in diameter, but I've been harvesting big bulbs and just trimming off the hardened root and some of the skin.  So far, I've only eaten it raw, sliced and sprinkled with a little bit of salt, but I'm excited to try the following recipe from Farmgirl Fare.

Kohlrabi Puree

  • 4 kohlrabi bulbs with leaves
  • 2 Tablespoons extra-virgin olive oil
  • 1 large onion, chopped
  • 3 cloves garlic, minced
  • 1 cup chopped mushrooms
  • 3 tbsp cream (or milk, chicken stock, olive oil, or water)
  • Salt and pepper to taste 

Rinse the leaves (discarding any that are yellow) pat them dry, and coarsely chop. Set aside. Trim the kohlrabi bulbs, peeling them if the skins seem tough. Cut the bulbs into 1-inch chunks.

Bring a saucepan of lightly salted water to a boil, and add the kohlrabi chunks. Reduce the heat and simmer until tender, about 15 minutes.
Meanwhile, heat the olive oil in a skillet. Add the onion and sauté over medium-low heat until softened, about 5 minutes. Add the garlic and cook, stirring, another 1 to 2 minutes. Don't let the garlic brown.  
Add the mushrooms and the reserved kohlrabi leaves to the skillet. Cover, and cook 5 minutes. Then uncover, and cook, stirring, until all the liquid has evaporated, 3 minutes. Set the skillet aside.  
Drain the kohlrabi chunks and place them in the bowl of a food processor. Add the mushroom mixture and the cream (or whatever substitute you're using). Purée until smooth. Salt and pepper to taste.  Transfer the purée to a saucepan and reheat over low heat, stirring, 2 minutes. Serve warm.


And those are just a few of the things that I'm rescuing from my garden this week!  Hope that you've also had some gardening success, and if you haven't started a garden yet... why not try?


Thursday, August 2, 2012

it's fish season!

Here in northern British Columbia, August is smack in the middle of salmon season, and let me tell you - I'm going to take advantage!  This recipe uses jarred fish (which tastes about a million times better than canned fish, but if you don't jar your own fish you'll have to make do with the canned stuff), as well as yogurt, a lemon, and a few fresh herbs.  It's summer, so hopefully even the boonies cook can grow a couple of herbs in a pot at this time of year! 

The bonus for this recipe is that it literally takes 8 minutes to make.  In the time that it takes to boil pasta, you can be feeding your entire family.  Because who wants to spend hours in the kitchen when it's so nice out??  not me.

I don't want to say I invented this recipe, but I saw a recipe in a magazine at the doctor's office, then tried to reproduce it at home.  I have no idea if it's the same...

Pasta with Salmon, Yogurt, and Dill


Ingredients
  • 4 servings pasta (spaghetti works well)
  • 1 c. frozen peas
  • 1-2 jars (or cans) of salmon (preferably sockeye), drained
  • 1 c. plain yogurt (not Greek)
  • 1 tbsp grated lemon rind
  • 2 cloves garlic, minced
  • 1/4 c. fresh dill, chopped
  • 1/4 c. fresh parsley, chopped
  • salt and pepper to taste
Instructions:

Boil water and add pasta.  During the last 3 minutes of the pasta cooking, add the frozen peas.

While the water is boiling, mix the yogurt, lemon rind, garlic and herbs together in a bowl.

Drain the pasta and peas.  Add the yogurt mixture and the salmon and mix.

Serve and OMNOMNOM.

Monday, June 18, 2012

Rainforest burritos

OK, I've been wanting to post this recipe since I started this blog and I finally got my cousin's permission to post it... as long as I change the name.  So, I hereby give you *drum roll*... the rainforest burrito!  Rainforests have nothing to do with the burrito, but it's kind of in keeping with what her family calls them. This recipe came from my cousin, who got it from her dad, who may or may not have gotten it from a restaurant somewhere.

This recipe is soooooo yummy! I'm not even an olive fan, but I couldn't dream of these burritos without them! For the boonies cook, it's reasonably attainable (the tomato is the only thing that won't keep for a long time in the fridge), and it's really fast to put together. 

For this recipe, you'll need:
  • 1 lb ground beef
  • 2-3 cloves of garlic, minced
  • 1/2 c. sliced or chopped almonds (preferably toasted)
  • 1 apple, chopped
  • 1/2 c. raisins
  • 1/2 c. sliced green olives
  • 1 tomato, chopped
  • 1/4 tsp. ground cinnamon
  • 1/8 tsp. ground cloves
  • flour tortillas
  • feta cheese
  • sour cream
  • salsa
  • lettuce
To make, brown the meat in a large frying pan or wok. Drain excess fat.
Now, add each ingredient in order up to the spices, stirring for about a minute after each addition. 

Heat some flour tortillas - you can do this one by one in a dry frying pan over medium heat.  Don't cook them - you just want them to soften.  Alternatively, you could place them in the microwave for about 20 seconds on high. Or in the oven wrapped in foil for about 15 minutes at 350°F.

Add a leaf of lettuce, then put the meat mix on it. Sprinkle some feta cheese, sour cream and salsa over the whole mess and wrap up to eat. You'll probably need to make this every night for a week because it's so dang good.

Monday, June 4, 2012

Spring rhubarb

Here in the Bulkley Valley, spring has sprung and my rhubarb patch is hastily producing some tangy red stalks to tempt me. One of my fondest memories growing up was sitting on the back steps at my house with a giant stalk of rhubarb and a little yogurt container of sugar. My friends and I would raid the rhubarb patch and dip the stalks in sugar, munching them down during the heat of the day in the shade of the house. The moment I discovered the rhubarb patch the first spring in my new house, I was elated!

Rhubarb is a great local food - easy to grow (seriously, I've never known a rhubarb patch to need maintenance of any kind).  In fact, I'm often completely baffled by the people who try to sell it at the farmers market or Safeway.  Doesn't everyone have a rhubarb patch??

So if you have a rhubarb patch, start raiding it.  Here are some great recipes to make use of that spring treasure!


Rhubarb Currant Chutney

This recipe comes from Epicurious and is wonderful on grilled pork chops, tenderloin or sausages. I'm pretty sure you could easily can this and have it for the whole year too.
  • 3/4 cup (packed) dark brown sugar
  • 1/3 cup apple cider vinegar
  • 2 tablespoons water
  • 1 tablespoon minced peeled fresh ginger
  • 1 1/2 teaspoons grated lemon peel
  • 1 cinnamon stick
  • 2 cups 1/2-inch pieces fresh rhubarb
  • 1/2 cup dried currants
Bring the first 6 ingredients to a boil in a saucepan, stirring until the sugar dissolves. Reduce heat and simmer for 5 minutes. Add the rhubarb and currants and simmer until the rhubarb softens. Serve warm with your choice of meat.

Dal with Rhubarb

This vegetarian recipe comes from Mark Bittman (of How to Cook Everything fame). It's super fast and very, very boonies friendly due to the use of dried staples and seasonal ingredients. In addition, it's vegetarian so you can help save the world just a little bit. I love it, but it's very gingery and tangy so hubby isn't a fan.  However, if you're like me and love a lot of flavour in your food, give this a go!

  • 1 cup dried red lentils, washed and picked over
  • 2 tablespoons minced fresh ginger
  • 1 tablespoon minced garlic
  • 4 cardamom pods
  • 1 tablespoon mustard seeds
  • 2 cloves
  • 1 teaspoon cracked black pepper
  • 1 dried ancho or other mild dried chile (optional)
  • salt
  • 2 tablespoons cold butter or peanut oil (optional)
  • chopped fresh cilantro leaves, for garnish
Combine all of the ingredients except the salt, butter and cilantro in a saucepan and add water to cover it by about 1 inch. Bring to a boil, then lower the heat so the mixture simmers gently. Cook, stirring occasionally for 25 to 30 minutes, or until the lentils are tender. Remove the cloves and cardamom pods, and add the salt, butter and cilantro. Serve on its own, or with steamed rice or quinoa.
In case you haven't had enough rhubarb, here's a whole slideshow of delicious rhubarb recipes from Epicurious!

Saturday, May 26, 2012

Read the labels

Hi folks,

Sorry for the long leave of absence.  I was out of town, then feeling lazy... but hubby and I are back on the healthy bandwagon, working out, running, and getting the diet back in order. So I thought that instead of a recipe today, I would talk a bit about tricky food labeling.

I was caught by tricky food labeling just yesterday. You see, I've been on a big Greek yogurt kick lately. Greek yogurt is high in protein, low in fat, and extra thick and creamy. We've been buying this brand here:


It's fantastic! Comes in handy single servings for work, a few yummy flavors (honey and lime are my favorites, hubby prefers berry flavors), and comes in a non-fat version too.  Here's the nutritional info:


Note in particular the amount of fat - this is in the regular version, so going non-fat isn't even all that different. 

Problem is, everyone and their dog seems to be on this Greek yogurt kick too, and it sells out in minutes in the local Safeway. So I was home on Vancouver Island last week, and my mom introduced me to a new Greek yogurt:

Note that it says "Greek Style" yogurt. This is important.
Because when I came home and bought a tub yesterday, I ate a few bowlfuls, then read the label:

 Holy guacamole Batman!  66% of my daily saturated fat in a bowl of yogurt?  This stuff is dessert, not breakfast! 

So here's my warning.  Beware of any labels that include the word "style", because it sure as heck isn't authentic.  I'll give the Krema yogurt props for being totally delicious, but with that much fat it damn well should be! 

Ditto with the word "drink" in place of "juice". Juice is liquid squeezed from a fruit. "Drink" is sugar water that may or may not include some form of fruit-based liquid, along with sugar, sugar, more sugar, and sugar.

Have a wonderful weekend!  I'm off to feed some pigs :)


Wednesday, April 25, 2012

Portable, Good-For-You Porridge

I am NOT a morning person.  Nuh-uh. My goal in life is to wake up as late as possible and still get to work on time.  So it follows that breakfast is not high on my list of weekday morning priorities.  Sometimes toast, most often nothing at all.  I usually just take a lot of snacks to work, and work through them as the day progresses. But once in a while I remember that I can bring a decent breakfast to work with minimal preparation. Instant oatmeal is an option, but I find most of the brands to be sickeningly sweet. So here is a version of instant oatmeal that you can make yourself - you could even prep several of these on the weekend and leave them in your cupboard to grab on the go.

You'll need a small jar with a lid (a 250 mL canning jar works great), some rolled oats, and whatever dry toppings you like on your oatmeal.

Fill half the jar with the oats, and sprinkle on spices of your choice (I add cinnamon and ginger and sometimes cardamom). Then add your toppings (dried fruit, nuts, flax seeds, coconut, whatever). Now close the jar.

When you get to work, dump the whole thing in a bowl, and measure out about 3/4 jar of water and add it to the bowl.  Microwave for 3 minutes on high.  If you like, you could bring an individual sized yogurt or cut up fresh fruit for the top. Voila!  Instant breakfast with minimal sugar or preservatives!  WIN.

Thursday, April 19, 2012

Pasta with Tuna and Broccoli

It would appear that posting about my former carb-obsession may have opened the floodgates to more pasta recipes.  Certainly, they've been a go-to thing over the past couple of weeks.  I mean, who has time to cook when there's playoff hockey to be watched? 

So in that vein, I'll present you with another easy and fast pasta recipe that puts most of your favorite food groups in a single bowl. My dad found this recipe several years ago - possibly in Canadian Living Magazine.  You may think it to be a weird combination of flavours, but it works - it really does. And for the boonies cook, it's pretty achievable.  The broccoli can be fresh or frozen, and everything else is canned or dried.

Start by breaking apart a head or two of broccoli and putting the florets in a steamer. Put the water on to boil for the pasta, and put the broccoli on to steam (about 5 minutes once it starts to boil - you want it to retain a bit of crispness).

Mince 3 cloves of garlic and saute them in 2 tbsp. olive oil in a large frying pan until fragrant but not brown. 

Add 2 cans of flaked tuna (drained) to the garlic and stir around. Then add 1 tbsp dried basil (or about 1/4 c. chopped fresh if you have it), and a few shakes of crushed red chili pepper (to taste).

Put about 3/4 c of raisins in a coffee mug.  At this point, your broccoli should be done, so drain the broccoli water directly into the coffee mug to blanch the raisins.  Then add the drained broccoli to the tuna mix and stir. After about a minute, drain the raisins and add those to the broccoli and tuna. 

Toss with the cooked pasta of your choice (I like rotini - it holds on to the tuna better than other pastas), and serve garnished with parmesan cheese. 


Tuna and Broccoli Pasta

2-3 servings of pasta (rotini works well)
1-2 heads broccoli, split into florets
3 cloves garlic, minced
2 tbsp olive oil
2 cans flaked tuna, drained
1 tbsp dried basil
crushed red chili pepper (to taste)
3/4 c. raisins
parmesan cheese

Sunday, April 15, 2012

Ginger and Spice Pancakes

Please tell me that you don't use store mix for pancakes...  Pancakes were a Sunday staple in my house growing up, and we always used this recipe from the Five Roses (1960's version) Cookbook.  While they were my favorite breakfast at home, I could never get used to store mix or restaurant pancakes.  They just tasted fake or something.

Pancakes from scratch really doesn't take much more time than pancakes from a mix.  Mix dry ingredients. Mix wet ingredients. Mix the two together.  How hard was that?

1 1/3 c. flour
3 tsp. baking powder
1/2 tsp. salt
3 tbsp. sugar
1/4 tsp ground ginger
1/4 tsp cinammon
1/8 tsp allspice
1 1/4 c. milk
1 egg
3 tbsp. vegetable oil
1/4 tsp vanilla

Mix all dry ingredients together in a large bowl with a whisk.

Measure out milk in a 2 c. or larger measuring cup. Add the egg, oil and vanilla and whisk until mixed together (I keep it all in the measuring cup to reduce the number of bowls I get dirty).

Pour the wet ingredients into the dry ingredients and whisk until just mixed (lumpy is ok).

Use a ladle or large spoon to drop by spoonfuls onto a hot griddle. I set the griddle at 320 F, but if you use a frying pan, set it over medium to medium high heat. When the edges start to lose that "wet" look, you can flip them.

Serve with maple syrup and butter. yum.


You can also mix this recipe up a bit: take out the spice and add 1 c mashed bananas for delicious banana pancakes.  Or add 1 c. fresh or frozen blueberries for blueberry pancakes.  Or add 1 tbsp cocoa and 1/2 c. chocolate chips to the dry ingredients for chocolate chip pancakes.

And have a wonderful Sunday!

Tuesday, April 3, 2012

Pasta and Stuff

Once upon a time, I was a carb-monster. I was 100% invested in the pasta-for-energy camp and probably ate it 4 days a week. I still get a little drooly when I see a ginormous plate of creamy pasta and sauce.  However, we all know now that too many carbs can be bad too, and that carb energy?  short lived and liable to make you bonk afterwards.  So the pasta-monster has had to be tamed a little in favour of lean protein and lots of veggies.

Despite all of this, there are some nights when the only thing that will satisfy is a big bowl of tortellini, and I have a million and one recipes for things to add to it.  Today's recipe is based on one from the Our Best Bites Cookbook. This cookbook is probably the most-used recipe book in my kitchen.  I discovered their blog a couple of years ago, and couldn't resist the book when it came out. Anyway, back to the recipe.  I have a tendency, when I'm feeling too lazy to hit the grocery store, to grab everything I can find in the cupboard and fridge, then search for recipes that might suit what I've got.  The other night, it was canned tomatoes, canned artichokes and ground turkey. The recipe I used as a base was the Tomato Artichoke Tortellini from the book. It's supposed to be vegetarian, but I couldn't let a good package of ground turkey go back in the freezer.

Put some water on to boil for your pasta - I like tortellini for this, but you could use anything.

Start by browning the meat in a large pan. When it's lost all its pink, add 3 or 4 cloves of garlic, minced and stir until it smells all garlicky and delicious.

Add in a can of marinated artichoke hearts, drained and chopped (my artichokes were not marinated, just canned in brine, so I added some oregano and basil and salt and pepper too). Also, add in a can of diced tomatoes, and a couple of tablespoons of tomato paste. Stir the whole lot until it's heated through, and add salt and pepper to taste.

Mix the sauce together with the pasta, and grate some parmesan cheese over the top. Serve!

I love a good one pot meal, and this kind of pasta really does the trick when you need a fast, hearty meal.  Notice that almost everything was canned, and hence, very accessible to the boonies cook! 


Meaty Tomato-Artichoke Pasta
(based on recipe from Our Best Bites)

1 lb ground meat (turkey or other)
3-4 cloves of garlic, minced
1 can marinated artichoke hearts, chopped
1 15 oz. can diced tomatoes
3 tablespoons tomato paste
salt and pepper (and oregano and basil if your artichokes aren't marinated) to taste
Parmesan cheese
1 package frozen tortellini


Thursday, March 22, 2012

Fandango

I'm a big fan of trying to cook everything from scratch, but I'm no food snob.  There are some nights when you just need a quick fix, when the grocery store seems too far away, and when something creamy and cheesy is the only thing that will satisfy hungry mouths. So it's always a good idea to keep some canned soups, frozen veggies, and a big bag of onions on hand. With a few basics, you can throw together a great meal in no time.

Today's recipe is based on a recipe from one of the first editions of the Best of Bridge cookbooks. It's a bit on the fatty side, but it's hearty and tasty and definitely a great option for the boonies cook.  Everything in it is easy to find in any grocery store and stores well at home, so you can whip this up on one of those nights when you haven't been shopping for two weeks and your fridge looks like it was burgled overnight.

Start with a pound of ground meat (as in most recipes like this, the meat you choose is interchangeable with whatever you have in the house). Brown the meat in a large pot, and drain off the excess fat.

Add a chopped onion, 2 c. sliced mushrooms (optional - my hubby looooves mushrooms) and 2 or 3 minced cloves of garlic and saute until the onions are translucent and the mushrooms are soft.

Add about 2 tsp. dried oregano, 1 tsp dried basil, salt and pepper.

Dump in one can of condensed cream of mushroom soup and 1 c. low fat sour cream.  Stir to mix.

Add one package of frozen spinach (thawed and drained), and mix to incorporate.

Pour the whole mixture into a large casserole, and grate mozzarella cheese over the top.  Place in the oven at 350F and bake for about 20 minutes until the cheese is melted and starts to turn golden.

Serve over rice or egg noodles. 


Here is your ingredient list:

Fandango

1 lb ground meat
1 onion, chopped
2 c. mushrooms, sliced (optional)
2-3 cloves garlic, minced
2 tsp. oregano
1 tsp. basil
salt and pepper to taste
1 can cream of mushroom soup
1 c. low fat sour cream
1 package frozen spinach
1 c. (approximately) of shredded mozzarella cheese

Monday, March 12, 2012

Quinoa!

Today's post is about my new favorite food - quinoa (pronounced "keen-wah"). Quinoa is a pseudograin - that is, it's not a grass seed like true grains. It's a boonies-friendly food because it stores easily (dry, airtight container), super healthy (see below), and extremely versatile.

When I first started seeing recipes for quinoa, I thought that there was no way that my local grocery store would have something that exotic - I'd probably need a specialty food store to find it.  Then, lo and behold, on a shelf above the rice there it was in a little green box.  There are three types of quinoa in my grocery store (Safeway): regular, red and black.  While quinoa in general tends to be expensive than rice, the red and black varieties are more so.  I've also noticed that my local bulk grain supplier sells it by the pound ($6.15/lb, but I have an old price list), so I might try ordering from her in the future.

Like I mentioned before, quinoa is as easy to cook as rice and is just as (if not more) versatile. It's also very healthy - high in protein, iron, calcium and phosphorus as well as some important amino acids. It's definitely better for you that white rice, and (in my opinion) tastier.

You can find a million and one recipes for quinoa on the web, but let me share a couple of my favorites:

Black Bean and Tomato Quinoa

This first recipe comes from Gourmet magazine through Epicurious.com I've made it for a bunch of potluck lunches, and for a side dish at home and it's always a big hit.  I've edited the recipe only slightly - instead of cooking the quinoa to their directions (which seems a bit fussy), I just cook it according to the instructions on the box.

Ingredients:
  • 2 teaspoons grated lime zest
  • 2 tablespoons fresh lime juice
  • 2 tablespoons butter, melted and cooled
  • 1 tablespoon vegetable oil
  • 1 teaspoon sugar
  • 1 cup quinoa
  • 1 (14- to 15-ounce) can black beans, rinsed and drained
  • 2 medium tomatoes, diced
  • 4 scallions, chopped
  • 1/4 cup chopped fresh cilantro
Rinse quinoa in cold water to remove bitter saponin coating. Cook quinoa according to package directions and allow to cool.
 
Whisk together the first five ingredients in a small bowl and add salt and pepper to taste. Add to quinoa and toss until absorbed.  Mix in remaining ingredients and salt and pepper to taste.

Breakfast Quinoa

I started looking up recipes for breakfast quinoa a few months ago when I had some plain, leftover quinoa in the fridge. It turns out, there are about a million different ways to make it. While you can make breakfast quinoa without milk (see this recipe), I prefer a creamy breakfast porridge. There are a couple of ways I've done this: 
 
First, you can cook the quinoa in milk instead of water.  I find that this takes quite a bit of time and careful observation (case in point - I burnt it just the other day), but the taste is creamier.  I add about 1/2 tsp cinnamon and 1/4 tsp of ground cardamom to 1/2 c. (dry) quinoa. You can add whatever spices you like.
 
 
Second (especially for leftovers), you can warm up 1 cup of leftover quinoa in a pot with a few tablespoons of milk or cream.  It will get mostly absorbed by the quinoa and make a decent breakfast cereal.  Add same spices as above.

Once you have nice warm, spicy quinoa, you can go to town with additions.  Lately, I've been favoring a tablespoon of chopped nuts, some shredded coconut, and half a sliced banana.  Top with some plain yogurt... yum!  Or you could add flax seeds, dried cranberries and apricots, and a bit of maple syrup? How about a few chocolate chips and some chopped orange slices?  The possibilities are endless!

I've been musing over the possibilities of savory breakfast quinoa too - how about sauteeing some leftover quinoa with chopped onions and mushrooms, and adding some oregano, thyme and black pepper? Place a poached egg on top for a breakfast of champions!  

Dang, now I'm getting hungry...  Hope you love experimenting with quinoa!

Wednesday, February 29, 2012

Basic white sauce - A versatile staple for the boonies cook

A basic white sauce is a versatile addition to any cook's repertoire and can be easily modified to suit many of the ingredients that you have in your house. I admit, I mostly make white sauce to use in pasta dishes, but you can also use it on just about anything. 

A basic white sauce has four main ingredients: milk, garlic, butter and flour.

First, melt 2 tbsp. of butter in a saucepan over medium heat. Saute 2 or 3 cloves of garlic (minced) until it becomes translucent and fragrant. Add 2 tbsp. flour and mix into a paste.  Add 1 cup of milk (a little at a time at first so your sauce doesn't become lumpy) and whisk. Heat the mixture (stirring constantly) until it starts to bubble, then turn the heat down to medium low and cook until the sauce thickens.

You can adjust the consistency of your white sauce by adding or subtracting butter and flour. Use 1 tbsp of butter and flour for a runnier sauce, or 3 tbsp butter and flour for a thicker sauce.


Now to get creative!

To make a cheese sauce for broccoli or cauliflower, add 1/4 c. shredded cheddar cheese to the thickened sauce and whisk until it melts.

For an interesting pasta dish, add 1 tsp. grated lemon rind and 2 tbsp fresh lemon juice, pepper, and 1/4 c. parmesan cheese. Mix with cooked pasta, spinach, and chopped tomatoes in a casserole and bake 20 minutes in the oven.

To make clam sauce, substitute 1/4 c. of clam juice for 1/4 c. of milk, add a drained can of baby clams. Mix with cooked spaghetti or linguine.

To make homemade mac and cheese: add 1/2 tsp dry mustard with the flour and 1/4 tsp. paprika and 1/4 c. parmesan cheese with the milk.  Mix with cooked macaroni, cubed ham, 2 c. spinach leaves, and 1 c. cubed cheddar cheese in a casserole.  Top with 1/2 c. grated cheese and 1/4 c. breadcrumbs.  Bake 20 minutes.  [this is a great way to use up leftovers from a Sunday ham - it's one of my hubby's favorite meals]

To make a delicious mushroom sauce, saute sliced mushrooms and garlic with the butter until they soften, add 1 tbsp thyme and some cubed blue cheese to the thickened sauce.

The possibilities are nearly endless!  What is your favorite addition to white sauce?


Friday, February 24, 2012

Protein

One of the issues with cooking in the boonies, is getting good quality food that won't kill your budget.  Protein is usually a huge killer to the food bill because let's face it, meat is expensive.  On that note, there are things you can do to decrease your protein bill a bit, while still getting quality meat (and other protein products). Here are some tips:

  • Make friends with a farmer. 
    • This has been the biggest relief to our food budget in the last couple of years since our friend Wade started a small farm.  This year, I bought a whole pig, a giant Thanksgiving turkey, and about 1/3 of a cow. Wade takes his animals to slaughter in the fall and has them processed at a local (inspected) butcher shop.  We paid about $200 for the beef and $280 for the pork (including the cut and wrap) and came out of it with about 100 lbs of  meat (ribs, roasts, ground, steaks, chops, bacon, etc..). That's a little more than $4/lb, which is a pretty good average I think. It may not be the least expensive price you'll pay for meat, but it's made up for in quality - it's delicious! Bonus, our meat isn't trucked from afar to make it to the skillet, decreasing the environmental impact a bit. If you don't know a farmer, try checking out farmer's markets near you.  Many markets have farmers selling meat, and you can find out from them if you can buy in bulk.  Usually, animals go to slaughter in the fall, so you have all summer to find a farmer near you.
  • Buy in bulk. 
    • Go to your local wholesale or Costco and check out the sales.  Even if you don't have a huge family, buy meat in bulk and separate it into smaller packages for freezing when you get home.
  • Hunt and fish.  
    • Hunting is not for everyone either, but if you are a hunter or know a hunter, you could have a great source of cheap protein. In the boonies, many people get more meat from hunting than from the grocery store. There are lots of regulations about gun-ownership, openings, tags and permits, but if you get one moose, you could have as much as 300 lbs of meat to get you through the winter.  Many butcher shops will process your meat for you, right from the hanging to the cut & wrap, or you can learn to do it yourself.  It's a great alternative to factory-farmed meats.  
    • Similarly, fishing can provide you with some great protein, but it can be expensive, especially if you go salt-water fishing (boats, gas, guides, etc..) and you won't get a lot of meat from the trip. If you live near the ocean, try buying direct from the fisherman at the wharf. It's often cheaper and the money goes directly to the guy who caught it, with no middle man.
  • Eat alternative protein. 
    • Learn how to incorporate beans and high-protein grains and tofu into your diet. The vegetarian lifestyle isn't for everyone, but eating at least one vegetarian meal per week will decrease your food bill, expand your horizons, and make you healthier. Beans and grains are also super easy to buy in bulk and store, making them perfect for boonies cooking.  Some high protein grains include quinoa, barley, brown rice, kasha and oatmeal. Be on the lookout for upcoming recipes involving quinoa - it's my new favorite thing.
Today's recipe: Garlic-Rosemary Pork Tenderloin

This recipe comes directly from the ladies at my favorite cooking blog Our Best Bites. You'll need 1 or 2 pork tenderloins, some grainy mustard, garlic, rosemary, and olive oil.

 First, rinse your tenderloin and trim off excess fat. Line a baking sheet with aluminum foil, and preheat the oven to  450°F.

In a small bowl, mix together 5 or 6 minced cloves of garlic (lots of garlic!), 2 tbsp of coarse-grain mustard, 2 tbsp rosemary (the recipe calls for fresh, but I've used about 3 tbsp of dried rosemary with success), and 2 tbsp olive oil. Add some salt and pepper to taste.

Put your tenderloins on the baking sheet and slather them with your mustard mix.  Pop in the oven for 20 to 30 minutes (the meat should be juicy, but not pink and the internal temp should be 160°F with a meat thermometer). I've also done this on the BBQ and it works great.

Serve with your favorite side dishes - roasted potatoes are great, but so is rice. Pickled beets are a great, colourful veggie accompaniment.

Thursday, February 16, 2012

Valentine's Dinner (aka Sat Fat Fiesta)

I seriously kicked some culinary ass on Valentine's Day this year. SERIOUSLY. I need to eat like a vegan for the next week to wear off all of the calories I consumed, but it was totally worth it.  So, this recipe is a little bit boonies friendly (I suppose anything that consists of essentially meat and potatoes can be easily made in the boonies, but I think the fact that the meat was so fresh and unfrozen made it a billion times better..).

I spent most of Valentine's Day home alone - I took a sick day, not so much because I was sick, but because I hoped that taking a day off would prevent me from becoming sick..  In the end, I probably ended up doing way more activity that I would normally do at work, but it all worked out.  I'm healthy, and I got to make a kick-ass Valentine's Day dinner that I probably wouldn't have had the time or energy to do otherwise.

My plan for Valentine's Day was to cook lamb - it's succulent, a little splurgy, very very tasty, and kind of romantic.  But, being in the boonies, I couldn't find a rack of lamb anywhere that wasn't frozen as hard as a brick.  So I deferred to steak.  I was inspired by the Cake Boss (of all people) - did you know he has another show called Kitchen Boss where he teaches you the recipes he makes at home?  I had no idea.  The things I miss out on by working all day!  Anyway, he was whipping up a fancy meal for his wife that consisted of pan-seared steak au poivre (peppersteak) with a creamy pan sauce.  I didn't pay enough attention to write down all the details, but when I my lamb-plans went awry I quickly fixated on that steak and did a little research. I think the recipe I came up with is a mix of about 3 recipes that I found online.  In the end, I went with a red wine pan sauce (made with dealcoholized wine because hubs doesn't drink) with garlic, balsamic vinegar and beef broth. Here are the basic steps.

1. Leave your steaks out for about 15 minutes so they are not ice cold when they go in the pan.  Generously salt them all over, then coat the top and bottom with fresh ground pepper. Press the pepper into the meat a bit so it sticks.  You really want to coat it good.

2. Over medium heat, melt about 1 tsp butter together with 1 tbsp olive oil in a large pan (I'm totally in love with the ceramic-coated non-stick fry pan that we got as a wedding gift - damn, it's fabulous!). Once the butter starts to turn golden (not brown!), add the steaks.  Don't try to squish them or cover them - just leave them be for at least 5 minutes (for rare) or up to 7 minutes (medium well) then flip them and repeat.  I'm not a steak guru - I went with 5 1/2 minutes on one side, and 7 on the other (I had thick steaks!) and they came out medium - just perfect. If you have doubts, I'm sure you can find a million references online for how long to cook steak.  The key is, DON'T SQUISH IT and don't flip it more than once.

3. When the steaks are done, put them on a plate and cover them with foil.  Add a couple of cloves of minced garlic into the remaining pan juices and saute until it gets nice and fragrant.  Add about 3 tablespoons of balsamic vinegar and cook for about 2 minutes. Then add 1 tbsp of dry thyme, 1/2 c. red wine and 1/2 c. beef broth and reduce the mixture until it gets a little thick and coats a regular spoon.

4. Remove the sauce from the heat, and add about 2 tbsp of butter and stir until it melts and thickens.  Pour this delicious concoction over your steaks and serve immediately.  Seriously, I have never had better steak in my life.


I served this up with some roasted garlic mashed potatoes. I roasted a bulb of garlic for about 30 minutes (chop the top off, drizzle with olive oil, wrap in foil, roast at 400 F).  This could (and probably should) be done ahead of time so you're not burning your fingers trying to squeeze fiery hot garlic cloves into your mashed potatoes.

Boil up some potatoes as your normally would for mashed potatoes (chop into large cubes, boil in salted water until a fork easily pierces them). Squeeze the garlic cloves out of the bulb and into the drained potatoes. Add some milk and butter (I never measure this - butter gives flavor, milk makes it creamy.  Adjust amounts until it looks/tastes right to you). Mash together.  Add some chopped green onions or chives, if you like.

Serve up a mound of mashed potatoes, the steak and drizzle that pan sauce over both.  You will love me forever.

Oh yeah, and don't forget the green things!  How about peas? Frozen peas are usually easy to get in the boonies, and they cook up super fast.  Pour them into a steamer over 1" of water and steam for 5 minutes. Add more butter.

I don't have any photos of this glorious dinner because it was gone before you could say "Happy Valentine's Day", but let's just say it was very well received!

Now, go on a diet. :)

Thursday, February 9, 2012

Black Bean Fajitas!

Here's a recipe that came my way back in university from dog-knows-where. It's a high-protein, low-fat, super-fast weeknight meal that uses just a couple fresh ingredients, and lots from the pantry. If you don't have tortilla wraps, have no fear - you could serve this up as a side dish with rice and salad. If you don't have green peppers, any colour will do. I've even made this with chopped zucchini. It's reasonably versatile.

First, chop up half an onion, several cloves of garlic and a bell pepper (colour doesn't matter). Saute those together over medium heat in a little bit of olive oil until the onions are translucent.

Drain and rinse a can of black beans. Add the beans to the onions and mix for just a couple of minutes.

Add some spices: about a teaspoon each of cumin and chili powder, some salt and pepper, and a pinch of cayenne pepper for heat (if you want). Mix well, then add about 1/2 cup of salsa (you choose the heat). Mix together and cook until heated through.

You could serve this in wraps with lettuce, cheese and sour cream, or as a side dish with rice and a salad or yam fries.


Recipe:
1/2 onion, chopped
2-3 cloves of garlic, minced
1 bell pepper (or 3/4 c. chopped zucchini or celery)
1 12 oz can of black beans, drained and rinsed
1 tsp cumin
1 tsp chili powder
1/4 tsp cayenne pepper (optional)
salt and pepper
1/2 c. salsa

Monday, January 30, 2012

Morrocan chicken

Hi all,

This super yummy recipe diverges from I consider "traditional" boonies fare. It is based on this recipe from Bon Appetit. It may seem exotic, but with the exception of the spices, almost everything in it is probably already in your pantry and freezer. I've adjusted the recipe to my tastes by adding more spice and some dried fruit, and leaving out some of the onions. I also use one of the value packs of chicken that comes with 8 thighs and 2 breasts, rather than 8 thighs and 8 drumsticks.

Don't be afraid of the spices in this recipe - it adds so much flavour, but it's not "hot" at all. Spices may be expensive to begin with, but as long as you're not cooking like this every day, I think it's a manageable expense. Don't bother with the fancy out-of-the-ordinary spices (like Hungarian sweet paprika) in the original recipe. Your everyday spices will work just fine.

This recipe calls for an eggplant, which is a delicious luxury if you can get it, but it doesn't store very well. If you manage to pick up a nice, fresh eggplant during your shopping trip, try to make this recipe right away (within a day or two). There are some tips for freezing eggplant on the interwebs, but I suspect the poor thing will be significantly worse for wear if you freeze and thaw it. Although I love it in this recipe, it's ok to leave it out if you don't have it. You could even try it with something less exotic, like zucchini.


First, if you did manage to get a decent eggplant, chop it up into 1" cubes and toss it with some olive oil. Spray a cooking sheet with olive oil, spread the eggplant cubes on it, and pop it in a hot oven (400°F) for about 20 minutes. The eggplant will brown and get this delicious creamy texture.

Next, slice up one large onion and 4 or 5 cloves of garlic and saute them together with some olive oil in a large, deep pan (I use a big wok) over medium heat. Once they've softened, add all of your spices. This will make the onions lovely and fragrant. Stir for a minute, then add a large can of tomatoes, 1 cup of water, and 3 tbsp of lemon juice. Bring this mixture to a boil and add your chicken pieces. I like to heap a bit of the sauce on top of each piece of meat so it gets all the benefit of the flavours. Turn the heat down to medium low, cover, and let it cook for about 15 minutes. Turn the chicken pieces over about half way through.

While that's cooking, coarsely chop some dried apricots and/or some dried, unsweetened cranberries and toss that in with the chicken.

Finally, take your eggplant out of the oven and toss it in with the chicken when it's nearly done, mixing gently. You can garnish this with toasted, slivered almonds, fresh cilantro and serve it with rice and a nice salad or steamed greens (don't forget to eat green things!).

Here is my modified ingredients list:

1 large eggplant, chopped into 1" cubes
1 value pack of chicken, deboned and skinned (roughly 8 thighs and 2 breasts)
1 large onion, sliced
4-5 cloves of garlic, minced
1.5 tbsp paprika
0.5 tsp salt
1.5 tsp turmeric
1.5 tsp ground coriander
1.5 tsp whole fennel seeds
several turns of fresh ground pepper
1 tsp ground cumin
0.5 tsp ground ginger
1 large (28 oz.) can of diced tomatoes
1 cup water
3 tbsp lemon juice
1 cup dried apricots and/or unsweetened cranberries

slivered almonds and fresh cilantro (optional) for garnish.

Monday, January 23, 2012

A Healthy 10-Minute Meal

Roast chicken, root veggies, potatoes and chard - this is a hearty meal that will warm up any night. It's perfect for winter because it uses vegetables that store very well and provide you with lots of great nutrients. As a bonus, this takes about 10 minutes of active prep time, and one hour to cook.

Chard is probably my favorite leafy green - it grows really well in the garden, lasting well into the fall (even through a hard frost). It also stores well in the fridge - just wrap the stems in a damp paper towel and store a bunch in a plastic bag in the crisper. It will stay crisp for at least a week, and is excellent steamed or in salads. The taste is similar to spinach, but a little more flavorful. Usually, I only see it in the organic section of the grocery store, but like I said - it's easy to grow in the garden, so you can enjoy it all summer and fall.

Potatoes, carrots, and parsnips store very well in a cool, dark place - months, if you keep them well ventilated and cool, so buy or grow them and store them in a root cellar, crawl space, or shed (as long as it doesn't freeze).

The recipe for the chicken is the easiest, tastiest one I know. It comes from Epicurious.com and easily feeds a family of 4. Buy whole chickens when they're on sale, preferably in packages of two or more. I got 2 at the wholesale for $14. Separate them out in ziploc bags when you gets home and freeze them.

For the chicken, you'll need:
- one whole chicken
- salt
- dried thyme

Rinse the chicken inside and out, and dry it off really well with some paper towels. You want to make sure it's as dry as possible, inside and out.

Place it in a roasting pan and truss it up. Then take about 1 tablespoon of salt (or the salt shaker) and "rain" salt down on the bird so it's evenly coated on top. This will make a nice, crispy skin.

Then throw that sucker in the oven at about 400° (the original recipe says 450°, but it always seems to get too dry when I cook it that way - could be my oven though).

That's it. Don't baste it, don't look at it.

While it's cooking away, cut up some parsnips, carrots and potatoes into large chunks. You want them to be about the same size so they all cook in the same amount of time. 2" cubes work. Once the chicken's been in the over for about 30 minutes, throw all the root veggies in the roasting pan with in and put it back in the oven for another 30 minutes.
Adding carrots, yams and parsnips


Finally, prepare some chard. Rinse each leaf and tear the green parts off the stem in chunks. Put about 1" of water in a large pot, and put the chard in a steamer basket over the water. If you don't have a steamer basket, just put the chard in 1" of water - you don't want to cover the leaves with water, just have enough in there to steam them. Leave this until the chicken is done.

When the chicken is finished (check with a meat thermometer, or stick a fork in the side and make sure the juices run clear, not pink), take it out of the oven and remove the root veggies from the pan with a slotted spoon. Crush about 2 tsp dry thyme (not ground) into the juices, then baste the chicken with the juice and let it sit.

Cook your chard over high heat for about 5 minutes until it all wilts. You can serve it with a bit of butter, or just plain.

Now serve it all up!

Wednesday, January 18, 2012

Spaghetti and meat sauce

This first recipe is a no-brainer for me as far as cooking in the boonies goes. Most of the ingredients are things you probably keep in your cupboards anyway, and you can make several substitutions based on what you have on hand.

This recipe is heavily adapted from the recipe in the Four Roses Cookbook (1960's version). It's been a family staple since I was little. The base of this recipe includes ground meat, canned tomatoes, tomato paste, tomato sauce and spices. You can use almost anything for the meat - beef, pork, turkey, or even moose or venison if that is what you have. Canned tomatoes can be diced or whole - I prefer to add my own spices, so I always just buy plain, unspiced tomatoes and sauce. This year, I'd like to get a greenhouse going so I can grow and can my own tomatoes.

The additions to this recipe include almost any vegetable that is in your fridge. This is a great recipe for getting rid of "almost-gone" veggies. You know - the ones that are kind of brown, wrinkled or wilty? In a sauce, you never notice that they're not perfect.

To start with, mince up a generous amount of garlic (I use 3 or 4 cloves) and chop up an onion. Chop up any other veggies that you plan to include (mushrooms, celery, carrots, bell peppers, etc..). You probably want 1-2 cups of veggies in addition to the onion. If you don't have anything fresh, you can use a drained can of mushrooms, or some frozen zucchini, or nothing at all (if you want a plain sauce).

Brown the meat until there's no more pink showing, then drain any excess fat. Add the onion, garlic and veggies and stir fry until everything begins to soften (it doesn't have to be totally brown - things will continue to cook in the sauce). Now add a large can of tomatoes, a small can of tomato sauce, and a small can of tomato paste and stir. You can also add about 1/2 c. red wine, water, or broth if it seems too thick.

Add the spices to taste and allow the whole thing to simmer while you boil a pot of spaghetti. A large pot of this sauce will make at least 6 servings, probably more.

See below for detailed recipe and instructions.

500 g (1 pound) ground meat, thawed. (Beef, pork, moose, turkey, or ??)
1 large onion
3-4 cloves garlic, minced
1-2 cups of chopped fresh, canned or frozen veggies (mushrooms, celery, bell peppers, zucchini, carrots, etc.)
1 28 oz. can of tomatoes, whole or diced.
1 small can of plain tomato sauce
1 small can of plain tomato paste
1/2 cup of red wine, beef broth, or water
1 tbsp. dry or 1/4 c. fresh basil
2 tbsp. dry or 1/3 c. fresh oregano
1 tbsp chili powder
1/4 to 1/2 tsp. cayenne pepper (to taste)
1 bay leaf
1/4 tsp cinnamon
1/8 tsp cloves
1 tbsp cocoa powder (unsweetened)
salt and pepper to taste.

Brown meat and drain off excess fat.

Add garlic, onions and veggies and cook until veggies begin to soften and onions are translucent.

Add tomatoes, tomato sauce, tomato paste and liquid and stir until combined.

Add spices, tasting as you go. Remove the bay leaf before serving.

Allow to simmer while you bring a large pot of water to boil. Add pasta and cook according to package directions.

Serve with parmesan cheese. If you have picky kids who don't like veggies, use a blender to liquify the sauce so the kids can't see the veggies. They'll never know ;)

1/52 post-workout dinner

Tuesday, January 17, 2012

welcome

You know how food blogs and recipe books have a million great ways to eat healthy? Now look out your door - if, like me, you can't see a Whole Foods, Safeway, or Costco within a days' drive, you might think your recipe plan is doomed. Have no fear, I'd like to share some tips on eating healthy (and cheaply) in the boonies.

To be clear, I'm not a chef. Not even close. I'm pretty good at following directions, and can manage most recipes that come across my kitchen. I like to make new things, and try to regularly introduce new items to the kitchen table. I don't live in the most isolated part of the world, nor do I live within walking distance of a fancy organic food store, greek deli, or any specialty. If it's not in Safeway, I don't have a chance.

I'll tell you what I'm about though. This year, I made a silent resolution to do a few things: save money on food, plan my meals better, cook in season, and help others in need. I see a load of people living here, and in places more isolated, who rely extensively on pre-packaged, processed food with limited nutritional value. Every time I see it, I want to shake them up - don't you know? You can eat healthy things! It doesn't have to take a long time! You can do it with the stuff in your local grocery store! Argh! So that's why I started this blog. I hope to share recipes (not necessarily mine) and ideas for eating using the foods most available near you. Hope you enjoy it!